Ready-to-use
Aranym for Windows
What is it?
It's an Atari Virtual Machine with lots of applications to run on your
Windows machine.
Why this full package?
I had many troubles whn trying to setup/recompile a working Aranym.
This configuration is based on EasyMint, quite
old but stable (at least on my Windows machines!). Very simple to use.
nothing to install (well something if you want to enable network
access).
What does it contain?
It contains an "Atari ST-like" machine as this:
- 14 MB ST-RAM
- 512 MB TT-RAM
- Aranym 1.1.0, used in jit mode (could be changed in run_aranym.bat)
- EmuTOS 1.1.1
- Mint 1.19 / Xaaes or myAES 0.98 (choice at starup), no FVDI and console modes also proposed
- Lots of softwares (basically everything coming from EasyMint)
- My own dev environment for VISION and GEMTAIL (in host file system
/H/PURE_C/PROJECTS)
- 4 disk partitions:
- /c System partition containing Mint OS
- /d Unix like partition working with Mint
- /e Software tools
- /h host file system, i.e. a folder shared between Aranym and
Windows
- Network setup ready (something must be done at Windows OS level, see
below)
- Aranym VM to be integrated into your local network
- Internet access enabled
- SSH server enabled (you can connect to Aranym VM from a SSH
client such as Putty)
How to install
- Download Aranym.7z (546MB)
- Extract it to some folder (you might need 7Zip)
- Run run_me_1st.bat, this will display FixedMemoryOffset and
FastRAM (max.value) to insert into config file
- If you want to enable LAN and Internet access from Aranym VM:
- Run tap-windows-9.21.2.exe; this will install a tap interface
Aranym can use to bridge to your physical LAN connection
- Rename ... to tap0
- Create a bridge adapter:
- Right click on Start menu, Run..., type in ncpa.cpl
- Select (use Control) 2 interfaces to bridge (e.g. tap0 and
Ethernet2), create bridge
- Right-click on the newly created bridge dapter, click on
"Properties" and make sure to tap0 and Ethernet2 interfaces are checked
(sorry french snapshots):
- Depending on your network configuration, you may want to
assign a fixed IP or let DHCP deal with it (double-click on "TCP/IPv4
item)
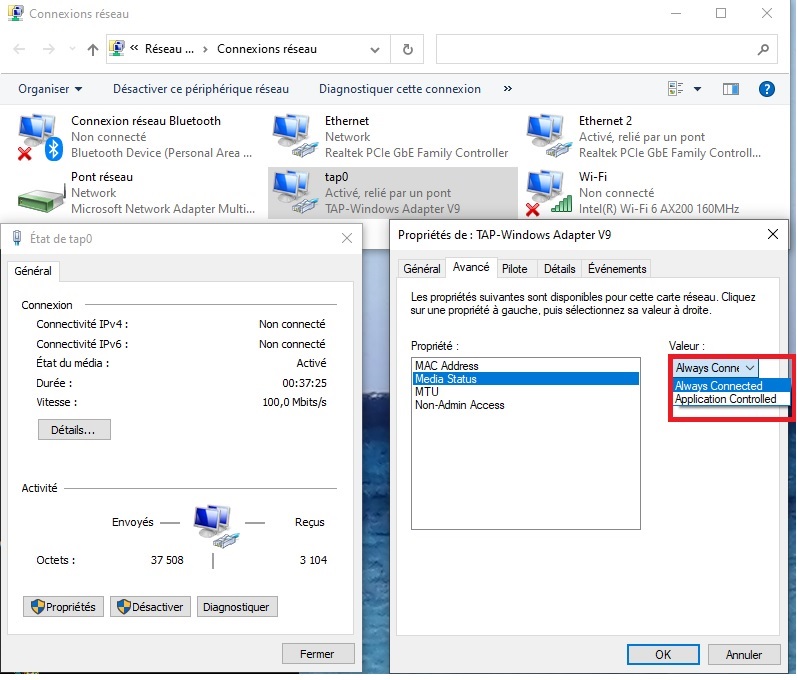
- Double click on tap0 interface, click on "Properties",
"Configure", "Advanced" tab, set "Media Status" to "Always Connected":
- Prepare the following network information:
- IP: pick a free IP in your LAN and allocate it into your
router (e.g. 192.168.0.91)
- Netmask: e.g. 255.255.255.0
- Gateway: e.g. 192.168.0.254
- Fill in this information in config file (these values are
default ones, you probably need to make them match your LAN
configuration)
- Note Gateway in config file is to be stated at HostIP line (yes
quite confusing :-))
How to use
- Run run_aranym.bat
- During boot process, you will be prompted to choose either Xaaes
or myAES (defaut is Xaaes)
- Welcome to the fastest GEM envirorment ever :-)
- Some applications are directly accessible from the desktop, feel
free to browse drive E for others
- Simply copy news apps to H drive (accessible from the host)
- To use SSH:
- With your favorite SSH client (such as Putty),
connect to the IP you configured previously
- Credentials: root/aranym
- To build VISION or GEMTAIL:
- cd /h/PURE_C/PROJECTS/VISION or cd /h/PURE_C/PROJECTS/GEMTAIL
- ./makeall.sh
- You can also do this directly from Aranym using "Start Shell"
entry from Atari menu (left click on left-bottom border)
- If Mint cannot reach LAN or Internet, first thing to check is to
open a shell from menu and type in ifconfig, you should see something
like:
- if not, check tap0, bridge setup and Aranym setup messages (such
as can't use netowrk interface xxx)
- To properly exit Aranym VM: Menu Tools-->Shutdown-->OK
(make sure to select "Halt the system")
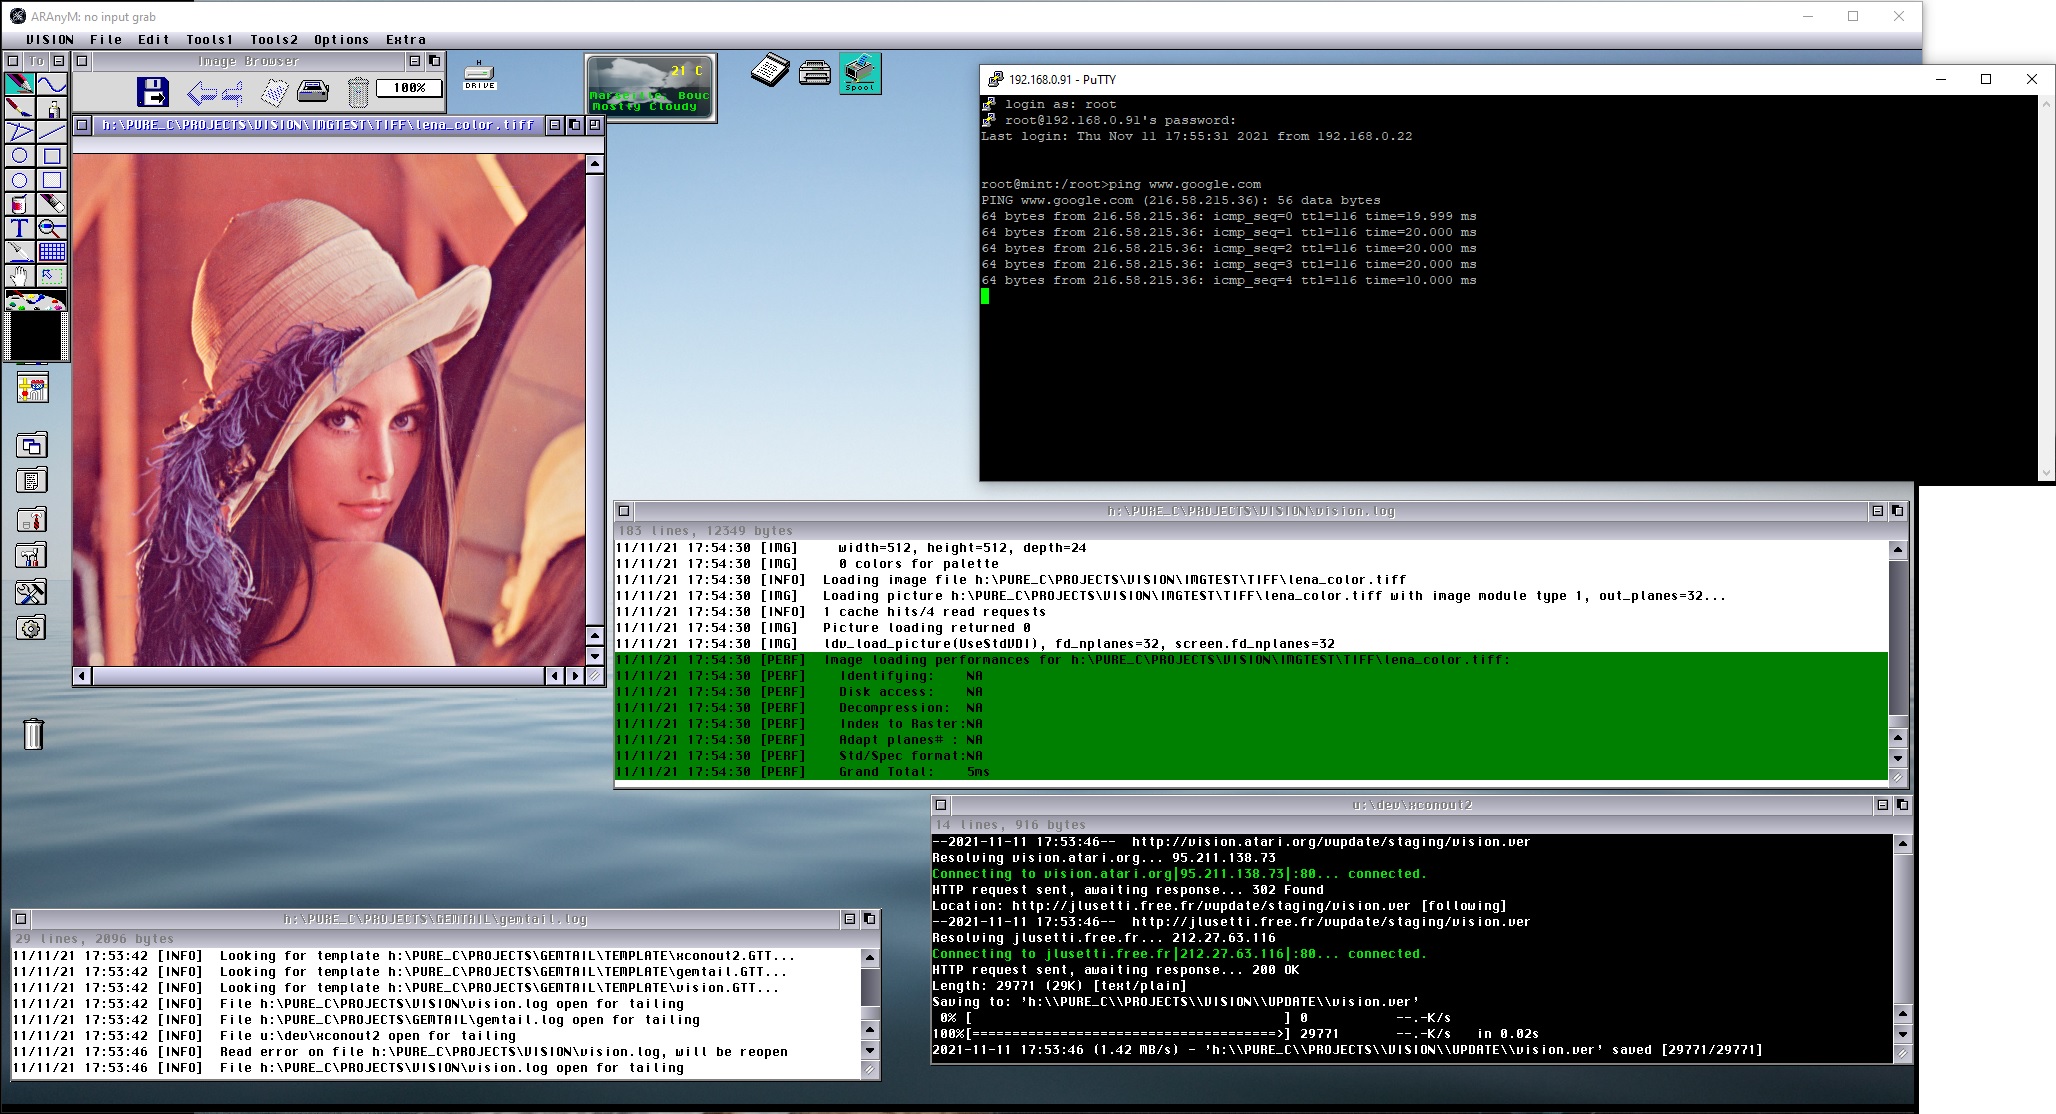
Finally, you should end-up with something like this (after GEMTAIL and
VISION started), note Putty session connected to Aranym: