|
VISION Documentation |
|
Last update: 05/07/98 |
|
8. COLOUR MANAGEMENT |
When an image is displayed, each image pixel is in fact a value corresponding to a given colour. Thus, 1 bit is required for each pixel in a black and white image (2 colours), 2 bits for a 256 colours image, 4 bits for a 16 colours image, 8 bits for a 256 colours image, and 15, 16, 24 or 32 bits for a True Colour image. The colours available on your computer are split according to the three primary components of the screen which are red, green and blue. Only the True Colour mode allows to work directly in each available colour, since each screen pixel has a value for the three components red, green and blue.
Choosing a colour in a palette
Choosing a colour in the True Colour wheel
The True Colour mode of the Atari Falcon 030 does not really allow to display 16 millions of colours, since the description of each point is done on 15 (or 16) bits, and not on 24. Thus, instead of 256 possible values of red * 256 possible values of green * 256 possible values of blue which give 16 millions of combination of colours, it is only possible to display 32 shades for each primary component, giving a combination of 32768 (15 bits) or 65536 (16 bits) colours. A 16 million colours image being worked upon in VISION is thus reduced to 32768 or 65536 colours, which is in most cases far more than what the human eye can distinguish on a picture.
Note: in 15 bits mode, each elementary colour is coded on 5 bits. In 16 bits mode, 1 bit is added to the green component, which is thus coded on 6 bits.
For other display types, each image pixel contains actually a number, which refers to a colour table containing the number of colours available in the resolution of the image. This table is called a Palette. When a colour is modified inside a palette used by an image, every point having the same index number will change to the new colour.
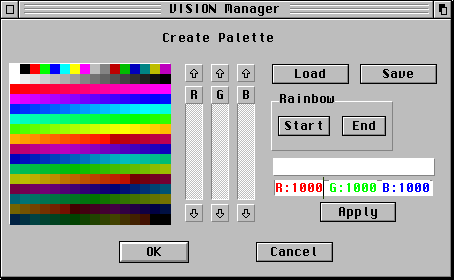
Using the Palette in the "Extra" menu, the colour to edit can be chosen by a click in the colour box. The RGB levels then appear as numbers in the associated object, sliders being proportional to the maximum value (1000). RGB values can be entered directly by hand, by typing these values in the object and clicking on "Apply".
Palettes can also be saved and loaded. The format used is the same than the format used by Interface II CPX.
A rainbow can be created easily using the following method:
The rainbow is then made automatically.
Since version 4.0a, there is an enhanced non modal window available by
clicking on the "Palette" icon in the toolbar:
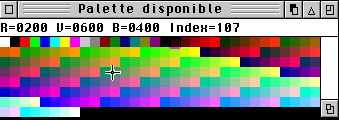 |
The size of this window can be
changed and when the mouse is positionned on a colour of the VDI
palette, its characteristics appear in the information bar. A click with the left button is enough to select this coulour as the current colour for drawing. |
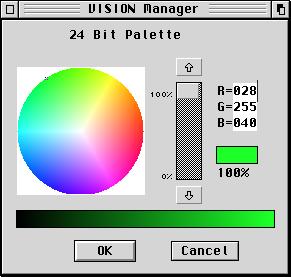 |
The True Colour wheel appears by
clicking on the palette icon in the tool box. This wheel is
divided in three angular sectors, each being dominated by a
component: Red, Green or Blue.
A similar wheel exists for each brightness level. To modify this brightness, use the vertical slider. The bottom rectangle displays, for the selected colour, every possible brightness. Last, above the smaller rectangle corresponding to the selected colour, the RGB components are displayed, and they can be edited directly. Since version 4.0a, this window became non modal. |
In modes other than True Colour, most image formats embed the palette used when the drawing was created. GEM uses also a palette to display objects on screen, such as windows, menus or icons. It is possible that the palette used in the image modifies the colour of GEM objects, or worse, makes them invisible. As a workaround for this problem, VISION offers three levels of protection:
The Standard palette command allows to switch quickly between the image palette and the maximal protection (GEM palette), and back. This option is particularly useful when an image loaded disturbs totally the sight of menus and tools. Pressing the TAB key then allows to see GEM objects. In 256 coulours, when the chosen protection is minimal or maximal, VISION optimises the distribution of colours, in order to left unchanged the GEM colours.
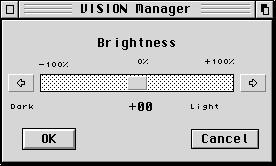 |
This option allows to darken or brighten a complete image. If the standard VDI format is not used, the brightness modification is instantly applied to the image, to obtain a real time view. |
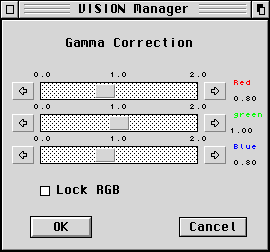
This option is very useful to modify the distribution of colours according to their intensity. Colours are modified according to a curve which, for each start colour on the co-ordinate, makes it correspond to the resulting value on the ordinate. For each colour of the image, RGB components are then adjusted. VISION allows to modify each Red, Green and Blue component either simultaneously or separately. Note that if the standard VDI format is not used, the Gamma factor modification is applied immediately to give a real time view.
The brightness we sense is not proportional to the real intensity. If the computer value of the intensity is doubled, you eyes will not sense a doubling of this intensity. This is the reason for the Gamma correction notion.
Instead of a formula of the kind: (1) L' = K x L
The relation has been complicated a little: L'= K x N x (L/N)^Gamma
where N is the maximal value of the computer intensity (1000 in case of VDI), and L <= N.
But the better is to try for yourself to vary the Gamma parameter.
Note that if Gamma = 1, you have a (1) relation.