|
VISION Documentation |
|
Last update: 05/07/98 |
|
9. MODIFY AND TRANSFORM |
This panel groups the main VISION's parameters:
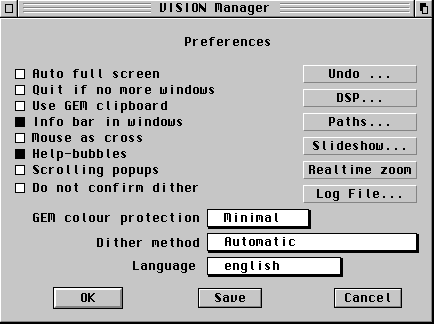
If this option is selected, VISION will switch to full screen immediately after an image is loaded.
9.1.2. Quit if no more windows
If this option is selected, the application will terminate as soon as the last window is closed.
If this option is selected, each clipboard operation will go through GEM (selection will be saved in the CLIPBRD folder of the boot drive (usually C)).
NB: In modes other than True Colour, the selection will be saved in IMG format, whereas in True Colour, the selection will be saved in TIFF format.
If this option is selected, an information bar will appear in each window, displaying the mouse cursor position in pixels, relative to the image top left corner, or the size of the objects being created. If you want to keep space to a maximum for the image, do not select this option. However, this will prevent you to see the current coordinates and the information messages.
If this option is selected, the mouse cursor will always appear as a cross, centered on the pixel to be modified. Very useful if the real time zoom window is used!
If selected, this option displays a help bubble on all dialog objects which have a help text. Very useful!
9.1.7 Scrolling popups (version < 4.0a)
Under the most recent AES versions, this option allows to limit the number of texts within popup style objects. A vertical slider then allows to move to select the desired text.
9.1.7 Long file names management (version >= 4.0a)
If your operating system allows to manage long file names (MiNT, MagiC, ...), you can select this option. Warning! Some versions of the operating systems behave better than others to this respect...
9.1.8 Do not confirm dithering
If this option is selected, VISION will not ask whether you want to load an image with more colours than the screen, but will load it directly. WARNING: if you save this image later, it will have been damaged by the dithering process.
In modes other than True-Colour, colours are relative to a palette. But GEM uses also colours from a palette. It can happen that GEM objects (windows, text, dialogs...) do not have the right colours, or worse, are not visible. As a workaround for this problem, VISION offers three level of protection:
When an image has more colours than what is supported by the display mode, VISION allows to display that image in black and white or in shades of grey. When the dither method is set on automatic, the program selects the most relevant dither method for the current display mode. When saved, a dithered image doesn't have the same number of colours as the original.
Since version 3.5, VISION can do a dithering True Color --> 256 culours. This dithering is then selected by the "Automatic" choice. If you still want to force a greyscale dithering, you only have to specify it.
VISION support several languages: you can change the language used from this popup. The language management directory only needs to contain a sub directory for the desired language for this language to appear here. When the language is changed, it is only effective when VISION is started next.
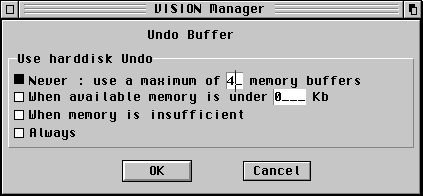
VISION offers a very flexible management of UNDO's (or possibilities to cancel modifications on an image). There are four possible methods:
1. Never use undo on disk
This option allows to define the numbers of buffers (i.e., the number of possible undo's) to use. This has the greater memory consumption. Recommended if you do not have a hard disk.
2. Use disk undo only when memory falls below a define quantity
This option allows to keep a certain amount of memory for other applications and images loaded by VISION. An undo buffer will be sent to disk instead of memory when the available memory is lower than the specified limit.
3. Use disk undo as soon as the available memory is not enough
A buffer will be sent to disk only if is not possible to create it in RAM. Undo in memory has priority, but there will be no error when the next buffer to allocate doesn't fit into RAM.
4. Always use disk undo
With this option, the undo area is always on disk, and never in memory. Recommended if you have a hard disk with enough free space! This option uses very few memory.
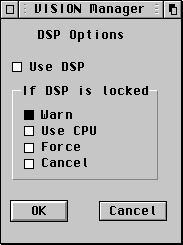 |
Using the DSP processor on ATARI
FALCONS speeds greatly the use of convolution filters.
The DSP button configures the behaviour of VISION with regards to the other programs which might use the DSP simultaneously. Warning: the "Force" option can lead to a crash! Only use it if you are sure there is no risk! |
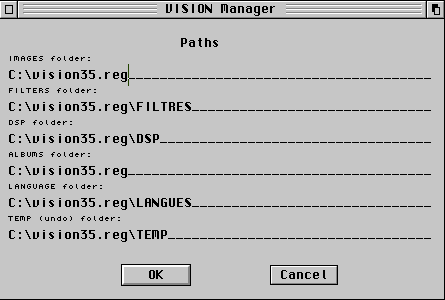 |
This dialog box sets the paths of
folders for:
|
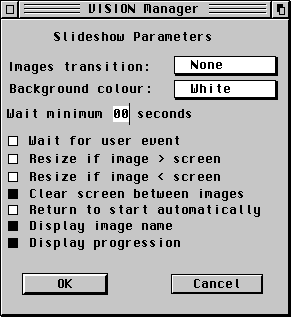
This dialog box allows to define some options for the slideshow
| Images transition | Defines how the next image will be displayed.
Three options:
|
| Background colour | Defines the background colour on which the image will be displayed (Black or White) |
| Minimum wait time | Defines the maximum time an image will be displayed before displaying the next one |
| Wait for user event | If selected, this option forces the user to press a key to display the next image. The minimum wait time is switched off. |
| Resize if image > screen | |
| Resize if image < screen | If the image to display is smaller than the screen, it will be enlarged, while keeping its proportions, to fit the screen exactly |
| Clear screen between images | If this option is not selected, it is possible than the previous image is still partially visible when the current image is displayed. Used wisely, this option allows to present a logical sequence |
| Return to start automatically | If selected, VISION will start again the slideshow when it reaches the end of it. Otherwise, VISION will come back to its previous state |
| Display image name | This option allows to display the image name at the top, horizontally centered. The font used is the one specified in the text parameter panel |
| Display progression | The current image number and the total number of images will appear at the top left if this option is selected |
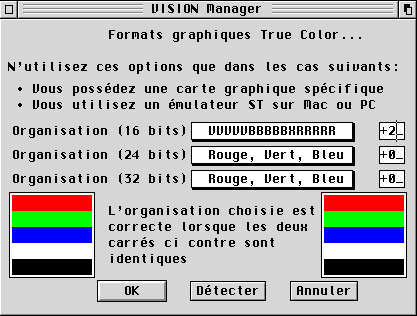
This panel allows to detect the True Colour organisation of your graphic card in the different possible modes. The simpler is to click on the "Detect" button, to let VISION try to find the RGB map organisation of your card. Once this detection is done, do not forget to save it when you are back on the preferences panel.
Notes:
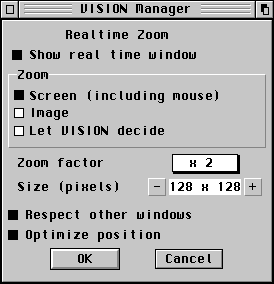 |
This screen allows to specify whether
the real time zoom must be used, and how. Zoom can be applied on:
Zoom factor: 2, 4, 8, or 16 Size of the zoom window: by step of 16 pixels, and limited according to the screen resolution Respect other windows: VISION asks the visible areas of the zoom window before displaying it. Slows slightly the process. Optimise position: the window will only be displayed at position which are multiple of 16 pixels to speed up display |
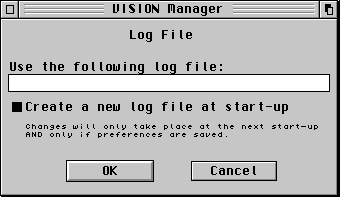 |
The Log file file allows to make the creation of
Slide-show automatic. Each time you will load an image with
'Open', this action will be recorded in the file specified. To use
this function:
|
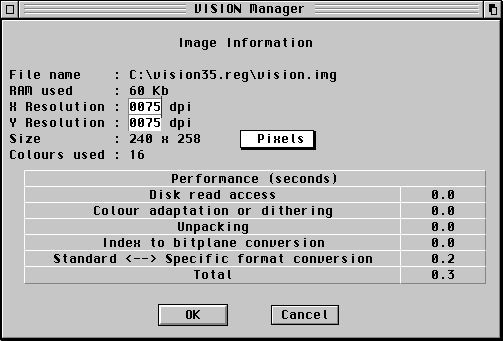
Displays all the information on the current image, and allows to modify the size in order to print it.
| File name | Gives the access path to the image file. |
| RAM used | Gives the space used in memory by the image. The memory space may be different than the image size, since it is also depending on the display mode of the machine. Thus a monochrome image (2 colours) displayed in black and white will occupy 8 time less space in memory than the same image displayed in a 256 colours screen mode. Thus, it is always better, to gain in processing speed as well as memory consumption, to work in a screen mode corresponding to the image displayed. |
| Résolution X and Y | Horizontal (x) and vertical (y) resolution corresponds to the size of the image for a printout. It is expressed as dpi (dot per inch), i.e., the number of images points printed on 1 inch (2.54 cm) length. These two information can be modified, to adapt the size of the image to the resolution of your printer. As some image formats do not contain this information, the default valued in VISION is the standard screen resolution, i.e., 72 dpi. |
| Image size | From the image size in pixel and the current resolution in x and y, VISION is able to display the image size in pixels, cm, mm or inches. Changing unit is done by clicking on the unit button. |
| Colour used | Displays the number of available colours in the image described. |
| Performances | This table displays the reading performances for this image file at all the loading steps |
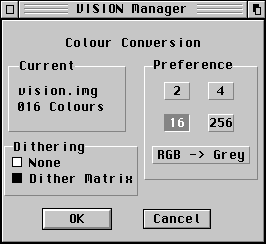 |
Allows to modify the number of colours for the current image. This modification is not possible in True Colour mode. While increasing the number of colours available does not alter the image, and gives immediately access to the additional colours, reducing the number of colours in an image can strongly lessen its quality. This option should be used only with simple drawings, when the file takes too much space, since saved with useless colours. A button allows to convert a colour image into shades of grey. The image thus obtained will be better suited to a black and white printout. The dither panel allows to dither a colour or shades of grey image when it is converted to two colours. |
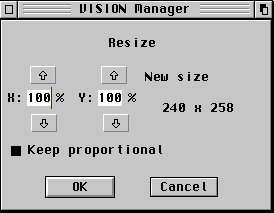 |
VISION
allows to reduce or increase an image size in pixels, by scaling
the image. You only have to choose the scaling percentage for X
and Y, the resulting size in pixels being displayed
simultaneously.
If the "Keep proportional" option is selected, scales in x and y will vary simultaneously, so as not to distort the image. |
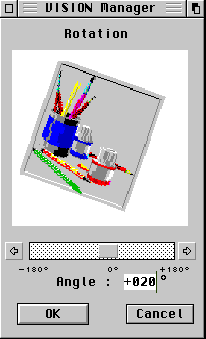 |
VISION allows to rotate a complete image up to the degree, with a real time preview. |
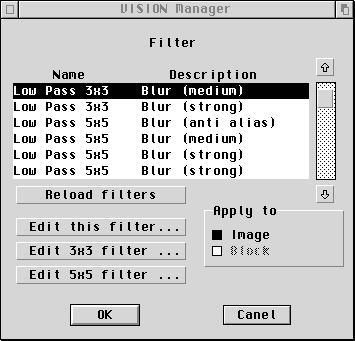 |
VISION operates
convolution filtering on a complete image or on a block, in 256
levels of grey or in true colour. Usage of the Atari Falcon DSP
allows to speed up greatly the processing of the image.
Configuring the DSP is done in the preferences dialog. The filters
available can be modified, and others can be created with the
Edit buttons.
The "Reload filters" option allows to read again physically all the filters without relying on the cache. This is necessary when new filters are added. |
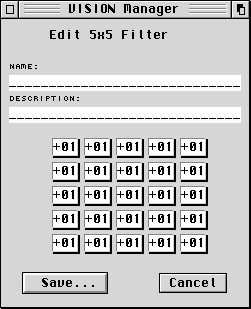 |
It is also possible to edit new filters with the
last 3 buttons.
There are two types of filters: 3x3 and 5x5, which use more or less contiguous points during the convolution process. Of course, 5x5 filters operate slower! |
What is a convolution filter?
A convolution filter is a matrix which will be applied on each point of the initial image.
Each matrix element specifies what coefficient (or power) this point will have on the resulting point. Let's take some matrix examples:
| Matrix | Explanation | |||||||||
|
Only the central (current) point is taken into account. The contiguous points have no influence on the result. It is an identical filter | |||||||||
|
Each point contiguous to the central point is affected from the same coefficient. Thus, they will have the same weight on the final result: it is a strong fuzzy filter. | |||||||||
|
The central point has a strong coefficient: 4
The closer points have a lighter coefficient: 2 The points farther have a low coefficient: 1 It is a light blur or Anti-Aliasing filter |
|||||||||
|
Contiguous points have a negative coefficient relative to the centre point: contiguous points will be "rejected" from the current point, it is a sharpness or outline filter. | |||||||||
|
Point situated on the left, at the top and the bottom will have no influence since their coefficient is 0. Only the points on the right will have a sharpening influence. It is thus an East oriented sharpness filter |
Try it! You will learn more editing and trying the filters bundled with VISION than with any math talk!
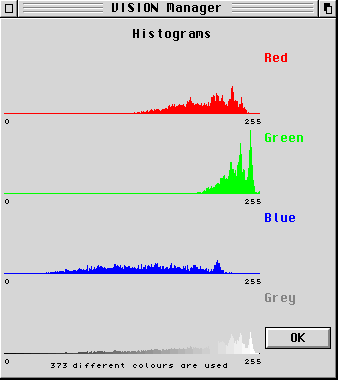 |
An histogram is the split of an image into its Red,
Green, Blue or Grey components. It allows to visualize the spectrum of an image according to its main components. Another interest is to know the exact number of different colours of the image. In the case of a 256 colours or less image, the "Grey" histogram is replaced by the colour index histogram from the colour palette of the image. |